How to Install an SMM Panel Script in cPanel Hosting
Buying an SMM panel script is only the first step. Before customers can register, place orders, or make payments, the script needs to be installed correctly on your hosting account.
Many beginners think the installation process is difficult because cPanel has dozens of different tools. Once you understand what each tool does, the entire setup becomes much easier.
In this guide, I’ll show you how to install a PHP based SMM panel script using cPanel hosting. Whether you’re using HostGator, Namecheap, A2 Hosting, Chemicloud, FastComet, or any hosting provider that includes cPanel, the process is almost the same.
What is an SMM Panel Script?
An SMM panel script is a PHP application that lets you run your own Social Media Marketing website.
Most scripts include features like:
- User registration
- Order management
- API provider integration
- Payment gateways
- Service categories
- Wallet system
- Admin dashboard
- Automatic order processing
Instead of building everything from scratch, you simply install the script on your hosting server and configure it.
Why Choose cPanel Hosting?
cPanel has been around for years and is one of the most popular hosting control panels.
It gives you everything you need in one dashboard.
You can:
- Upload website files
- Create databases
- Change PHP versions
- Install SSL certificates
- Manage backups
- Create email accounts
- Schedule Cron Jobs
Almost every PHP script is designed to work with cPanel, which makes installation much easier.
Requirements Before Installation
Before uploading your script, make sure you have the following:
✅ cPanel hosting account
✅ Domain name
✅ SMM panel script ZIP file
✅ SQL database file
✅ Database details
✅ FTP client (optional)
✅ SSL certificate
It’s also a good idea to keep a copy of your script on your computer in case you need to reinstall it later.
Step 1: Login to cPanel
Open your hosting account and log in to cPanel.
Your hosting provider usually gives you a link like:
https://yourdomain.com/cpanelor
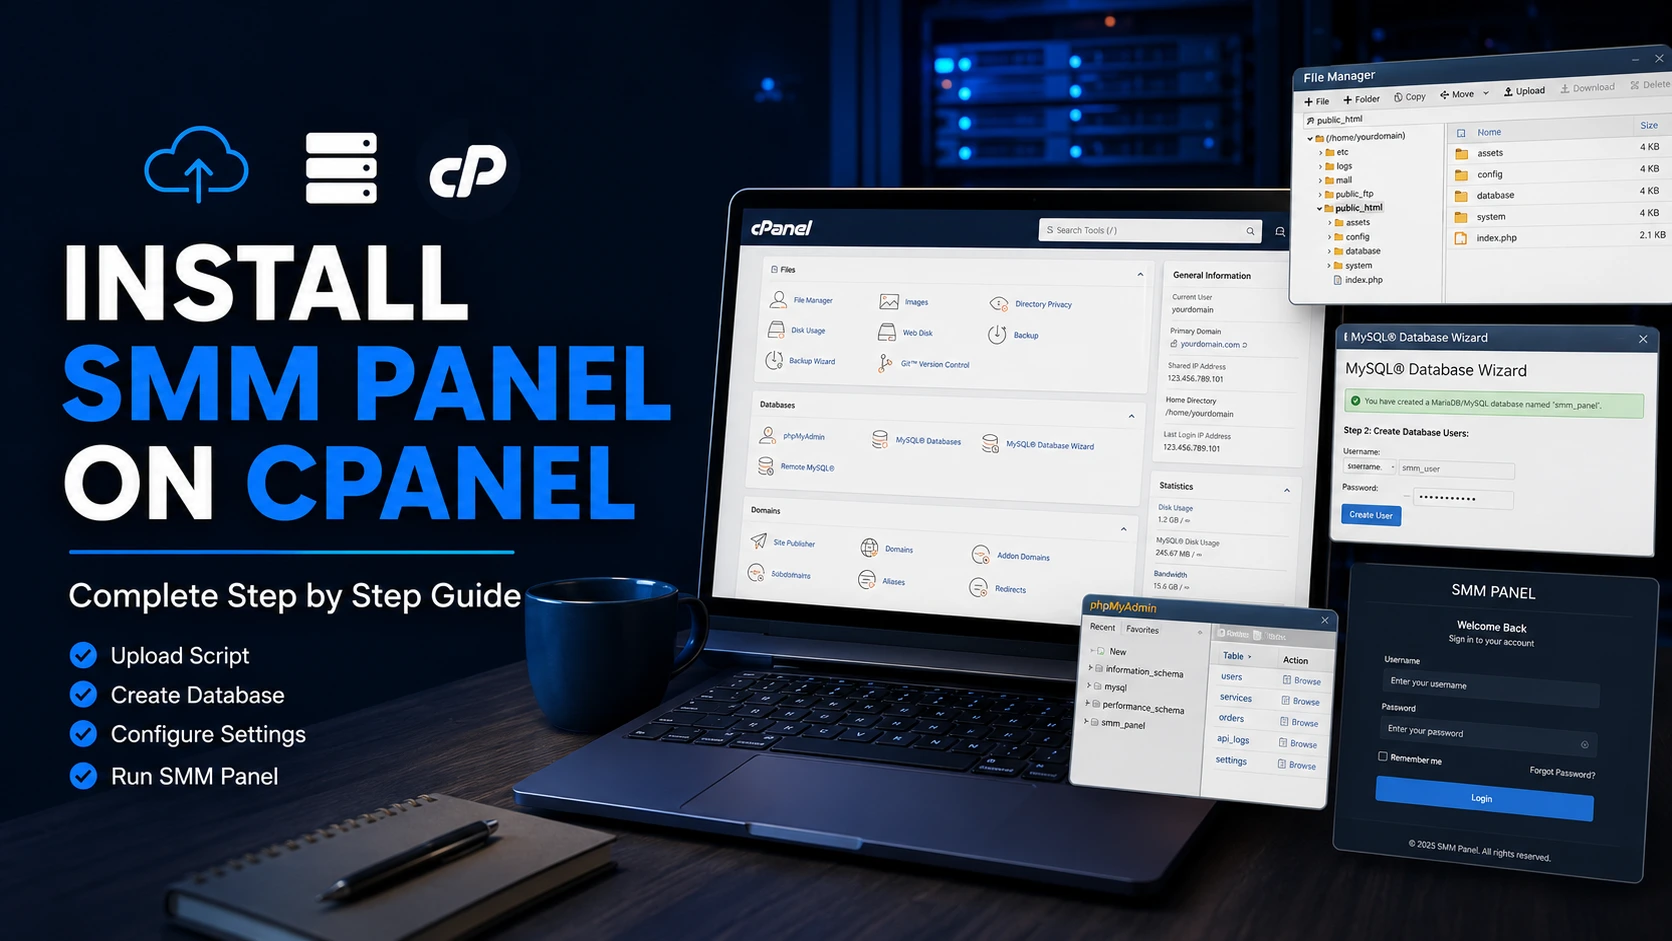
https://yourdomain.com:2083After logging in, you’ll see the main cPanel dashboard with tools such as:
- File Manager
- MySQL Database Wizard
- phpMyAdmin
- SSL/TLS
- MultiPHP Manager
- Cron Jobs
These are the sections you’ll use during the installation.
Step 2: Open File Manager
From the cPanel dashboard, click File Manager.
Navigate to:
public_htmlThis folder contains your website files.
If you’re installing the panel on the main domain, remove any default files that came with the hosting account.
Many hosting companies include a placeholder page like:
index.htmlDelete it if it’s no longer needed.
Step 3: Upload the SMM Panel Script
Click Upload.
Select the ZIP file of your SMM panel script.
Wait until the upload reaches 100%.
Once it’s uploaded:
- Select the ZIP file
- Click Extract
- Extract it inside public_html
Your folder should now look something like this:
public_html

application/
assets/
admin/
system/
vendor/
uploads/
index.php
If your files end up inside another folder, move them into the root of public_html. Your index.php file should be directly inside public_html, not inside a nested directory.
A wrong folder structure is one of the most common reasons a new installation shows a 404 error or loads a directory listing instead of the website.
Step 4: Check File Permissions
Before moving on, verify that your files have the correct permissions.
Typical settings are:
Folders : 755

Files : 644
Avoid using 777 permissions unless the script developer specifically requires them for a writable folder. Keeping permissions restrictive helps protect your website from unauthorized changes.
Step 5: Create a MySQL Database
Your SMM panel needs a MySQL database to store users, services, orders, payment records, and settings.
Inside cPanel, open MySQL Database Wizard.
Create:
- Database Name
- Database User
- Strong Password
Example:
Database Name:
user_smmpanel

Username:
user_admin

Password:
************
After creating both, assign the user to the database.
Don’t forget this step.
Many beginners create the database but never connect the user. The installation fails because the script can’t access the database.
Step 6: Assign All Privileges
Select your database user.
Tick ALL PRIVILEGES.
Click Make Changes.
Your database is now ready.
Step 7: Import the SQL Database
Open phpMyAdmin.
Select your newly created database.
Click Import.
Choose the SQL file included with your SMM panel.
Example:
database.sqlClick Import.
If everything is correct, you’ll see a success message.
Your database tables should now appear in the left sidebar.
Typical tables include:
- users
- orders
- services
- categories
- payments
- settings
- tickets
If you don’t see tables, the SQL file wasn’t imported correctly.
Step 8: Configure the Database Connection
Now connect your script with the database.
Depending on the script, you’ll edit one of these files:
application/config/database.phpor
config.phpor
.envExample configuration:
Hostname: localhost
Database: user_smmpanel
Username: user_admin
Password: your_password
Save the file.
One incorrect letter in the username or password is enough to cause a database connection error.
Step 9: Select the Correct PHP Version
Most modern SMM panel scripts support:
- PHP 8.1
- PHP 8.2
- PHP 8.3
Open:
cPanel → MultiPHP Manager
or
Select PHP Version
Choose the version recommended by the script developer.
Using an older or unsupported version may result in:
- HTTP 500 Error
- White screen
- Deprecated warnings
- Fatal errors
If your script was recently updated, PHP 8.2 is usually the safest choice.
Step 10: Enable Required PHP Extensions
Most SMM panel scripts require these PHP extensions:
- mysqli
- curl
- mbstring
- openssl
- zip
- fileinfo
- gd
- json
- xml
- intl
Enable them from:
Select PHP Version → Extensions
If an extension is missing, some features may stop working. Payment gateways, image uploads, or API connections are common examples.
Step 11: Install a Free SSL Certificate
Customers should never access your panel over HTTP.
Inside cPanel, open SSL/TLS or Let’s Encrypt (depending on your hosting provider).
Enable SSL for your domain.
After installation, your website should load as:
https://yourdomain.comUpdate your script settings if it stores the website URL.
Step 12: Configure Cron Jobs
Cron Jobs automate background tasks.
Most SMM panels use them to:
- Update order status
- Check API providers
- Process refill requests
- Sync services
- Send scheduled notifications
Open:
cPanel → Cron Jobs
Your script documentation normally provides the exact cron command.
Example:
php /home/username/public_html/cron.phpOr:
/usr/local/bin/php /home/username/public_html/cron.phpSet the interval according to the script documentation.
Before saving, test the command manually if possible. It saves time when troubleshooting later.
Step 13: Test Your Website
Open your domain.
Check every major feature before announcing the panel.
Go through this checklist:
✔ Homepage loads correctly
✔ User registration works
✔ Login works
✔ Admin login works
✔ Categories appear
✔ Services load correctly
✔ Payment gateway opens
✔ API provider connects
✔ Orders can be placed
✔ Cron jobs execute successfully
Finding issues now is much easier than fixing them after customers begin using the panel.
People also search for:
How to Install an SMM Panel Script on Hostinger
Hosting How to Fix Database Connection Errors in PHP
How to Fix HTTP 500 Internal Server Error
Best Payment Gateways for SMM Panels
PHP 8.2 vs PHP 8.3 for Web Hosting
How to Create Cron Jobs in cPanel
Common Installation Errors
Database Connection Failed
Usually caused by:
- Wrong database name
- Wrong username
- Wrong password
- Database user not assigned
Double check every database value.
White Screen
Usually happens because:
- Wrong PHP version
- Missing PHP extension
- Fatal PHP error
Enable PHP error logging while debugging.
HTTP 500 Internal Server Error
Possible reasons:
- Incorrect
.htaccess - Corrupted upload
- Unsupported PHP version
- File permission problem
Review your server error logs for the exact cause.
Page Not Found
Often caused by:
- Files uploaded into the wrong folder
- Missing
index.php - Incorrect Rewrite Rules
Verify that your script files are directly inside public_html.
SSL Not Working
Check:
- SSL certificate installed
- DNS pointed to hosting
- HTTPS forced correctly
Sometimes SSL activation takes a few minutes after installation.
Security Tips
After installation:
- Delete any installation folder if instructed by the script developer.
- Change the default administrator password immediately.
- Enable automatic backups through your hosting account.
- Keep your PHP version supported and updated.
- Update the SMM panel whenever a security patch is released.
- Never share your cPanel credentials with unknown developers.
Small security habits help prevent bigger problems later.
Frequently Asked Questions
Can I install an SMM panel on shared cPanel hosting?
Yes. Most PHP based SMM panel scripts run on shared hosting if the server meets the required PHP version and extension requirements.
Which PHP version should I use?
Always follow the script documentation. Many actively maintained scripts support PHP 8.2 or PHP 8.3.
Does every SMM panel need a MySQL database?
Yes. User accounts, orders, services, and settings are stored in a MySQL database.
Why aren’t my cron jobs running?
Check:
- Cron command
- File path
- PHP binary path
- File permissions
A single incorrect path can stop scheduled tasks from running.
Can I move my panel to another hosting provider later?
Yes. Create a full backup of your website files and export your MySQL database before migrating.
Final Thoughts of me
Installing an SMM panel on cPanel becomes much easier once you understand the process. Upload the script, create the database, connect the configuration, choose the correct PHP version, install SSL, and configure cron jobs.
Take your time during the initial setup. Most installation problems come from small mistakes like incorrect database credentials, missing PHP extensions, or files placed in the wrong directory. Checking each step before moving to the next usually prevents hours of troubleshooting later.